Monday, March 8, 2010

AWESOME Bedroom Dresser REDO

I spent more time taking off these STUPID stickers than I did on the WHOLE project....
Let dry for 2 hours and then sand
I used Kilz indoor satin paint from Walmart called Groovy Green.

Let dry for 2 hours with EACH coat!
I like it rough...
AGAIN....I like the dirty and rough look of things...
and DON'T forget to wait another 2 hours and then clear coat (I like FLAT CLEAR) 
Can you spot the 80%er in me on this shot?
And I wish you could see the beautiful sun setting in the mirror.
Are you ready......
Drum roll PLEASE.....


All I have to say is DON'T be JELL Auntie K!

Friday, March 5, 2010

Getting ready for Warm Weather

Look at this picture... (are you lookin?)
 

So are you thinking..."What does a sheet, P.J'.s and two tanks have to do with warm weather?"  
Well I am sure you ALL know HOW FREAKIN' totally pop ("popular" for those of you who haven't caught on to our lingo) tank dresses are right now...and Tanks with Skirts.
If not here are some pictures....


So I decided to give a go at it....went to a local Thrift store...found that GORG sheet and trendy owl PJ's for the skirts, and the 2 tanks for the tops.
Total Cost was $6

So first I came home and cut my dimensions out.
(that I totally made up btw)
The sheet was cut at 18" X 92" .I wanted it floofy.
The Owl PJ's were limited to 9" X 72"
(sewing 3 of the single leg sides together)

So the FIRST step on sewing, is sewing ends together so you have a HUGE circle.

2nd  set your machine to a 4 on the stitch and it should naturally gather the material evenly.
(a REAL seamstress would hem the edges first...but the 80%er in me won't let me take THAT much time to do this step.... :O)

3rd you are going to get your tank top and the shirt you just made

THEN...put skirt in the INSIDE of the tank and pin at the front/back/and sides first, and then add 4 to 5 in between each point.


AND VOILA...
done...
it seriously took me all of 20 minutes to make this one!


And then for the Sheet Skirt....Do the same... but don't add it to the Tank...just leave it plain as a skirt. My little princess didn't want it hiked up...she wanted it on her hips... :O)

If you click on this picture you'll see I added a smaller elastic and a large Elastic.
I LURVE IT!

 
And check out our Fabulous Feature Friday in the below post!

1st Fabulous Feature Friday

Occasionally we want to feature a favorite site, person, or craft someone has emailed to us. 
Someone who is inspiring in so many ways.
First up...


This lady Kris..
 Is amazing.

She is crafty. And has totally new and fresh ideas!
Some of our fav's are...

Old window...turned window box.


Decorative message board...
and

Decorative plates...


Check her site out for more fabulous ideas!!

Thursday, March 4, 2010

Lil' Birdies

I found these cute lil' resin peeps at the Dollar Store.
 I must be obsessed with birds, 'cause I tend to always be taking pictures of them, and finding little birdie trinkets.
I thought that  they were so cute the way they are, but wanted them to match to my little girls room.


So I got out this trusty spray paint, and gave them a once over! 
Then slightly sanded them to give them a more antiqued feel..


Perfect for the end table.....


And perfect for one to perch on the window box!
Sweet Lil' Peep makeover!
All for TWO  DOLLARS!

Monday, March 1, 2010

Dainty and Sweet

I love lamps!
I know I have said it a gazillion times, but it is true.
I REALLY do.
I  like the lamp in my little girls room, but have wanted something a tad more dainty, feminine, and tall. 

Current Lamp....
(A little small)

So you could imagine my delight when I found this ditty at the thrift store for $4.00.
(That's right....I did a little "$4 holla dance" right there at the store.
I know what you are thinking "Oh no you didn't!" But OH YES I DID!)

 So I took this hunk of goldy yellow and glammed it up using these two paints.
I just mixed the two for a soft sweet pink.


 I then applied a  light coat...

And then sanded the edges.

I like the gold showing through.
It makes for a more antiqued feel.

Now it is ready to display!


I also found this old vintage pitcher and basin for $1.00.
Isn't it sweet?

 
And I made a few more modpodge books for my little girls room.
(If you missed the tutorial go here)


Now just one more accessory, and the end table looks perfect! 


A perfect lamp and small end table change!
I am loving the tall lamp!

Thursday, February 25, 2010

Are you sick of Chairs yet?

So....First I'd like you all to compliment me on my skills of putting the chair in almost the exact spot and taking the second picture without looking at my camera...I just have an eye for these things...not to Brag! :O)


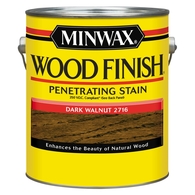
I have taken it upon myself to assume we've done enough tutorials on these chair for you to get how we do them....maybe I'm wrong if so....sorry it's the "80%er" in me. I just took pictures of before and after. So I used the SATIN Krylon Spray Paint I do not sand the chair down...I just spray paint it and then stain it with  Minwaxs Dark Walnut. 

I am looking for 5 more chairs like this...random and different, but all tall backs and old school...I am going to paint them all the same but recover them a little different. And then redoing my Kitchen table the same....  I think it will be SUPER FAB when it's all done. 

I'll Post the Finished FULL product when I find 5 more chairs. :O) The thing that stinks is I found 4 the day I bought this one for $4 dollars but I decided to wait...GRRRR!

Not so Super Fab...but at least it's not too Drab anymore....

SO I KNOW you have all learned...I am pretty much a slacker .Bon and   Han are on top of things...so it's not going to be a surprise when I say that I forgot to take a picture of these jars at first...and didn't remembered till after I was spray painting....???  
I can sense your judging eyes...DON'T JUDGE ME!

I found these Drab bins at the DI.
So 1st you are suppose to take a picture...and THEN spray paint.

Step 2- Sand to your liking....and check out what you've done....

Step 3 Add whatever you want...(for me hair bows, ribbons, elastics, and head bands....)

Step 4...(If you are me) wait till you move in a month to ACTUALLY have counter space so you can display the GOODS!
And not have a drawer full of  a mess!!!!