Showing posts with label Painting. Show all posts

Wednesday, September 16, 2015

Entry Way and Front Room Update


So when I moved in to this house all the walls were white. Don't get me wrong, I LOVE WHITE, but kids and white walls really don't mesh. I have  slight , okay who am I kidding, major OCD and I think the white walls may very well have been the death of me. Those tiny peanut butter hand prints all over the place just weren't cohesive with my decor. 

The painstakingly loooooonnnngggg process of choosing a paint color was hard. I am loving all the griege colors that are out, but every time I sampled a greige it made the undertones in my kitchen cabinetry look more yellow. {YIKES} And I have these beautiful vaulted ceilings so it needed to be a color that could go throughout all the main living areas. 
I am pretty sure I tried 10 different colors on the wall. That is when I called up my friend, Lisa, in desperation.( She is pretty much a paint color expert.) I told her my dilemma, that I wanted greige but it didn't work. She very simply stated..."you can choose a griege that belongs more in the tan family but without yellow undertones.
" UHHHH HELLO! Why didn't I call her sooner?? 

Then she said the best thing ever- "Bonnie, try Sherwin Williams Loggia. It is beige, with a little gray tone." 
I ran right out and bought a sample can. 
Guess what??
 I was instantly in LOVE.

It was exactly what I wanted. 
Not too dark, no hues of yellow, warm and cool, and bright n' fresh. 
I am positive she is a color master! I know who I am turning to for a paint dilemma next time. 
(Sherwin Williams Loggia -SW7506)

With my paint color decided, I was ready to tackle this project. Well, maybe just THINK about it.

I wish I could say I was 100% ready to go, but let's face it, painting overwhelms me. Thank goodness for my good friend Brenda. She gave me some (much needed) gentle nudging to start the process. She helped me every step of the way. 
SERIOUSLY-- I have some pretty amazing friends!!

I knew I wanted to add paneling, to the entry way wall. 
Like my husband and I did on our laundry room project -

So we bought 2 sheets of white paneling.

 And some MDF to mold it out. 


 We added the wainscoting and got to work on the painting.
(Sorry, I have been bad with pictures taking - crappy cell pic alert.)

It really is amazing how simple changes like wainscoting and paint can completely transform a room.

I am probably the worlds slowest decorator. I am very methodical when I start a room.
 But hey, two years isn't too long to finish a space is it? haha

Entry Way-


And a couple before and after shots. 
I am a sucker for a before and after shot.

Wednesday, April 1, 2015

Window Seat Update

So I have these beautiful window seats in a few of my rooms.


Not only do the rooms need some paint, white just won't cut it with kiddos, these rooms also need a little updated. 
I think the wood "dates" the house.
So after a bit of research and some prep work, I decided to get this room into shape!

First up, I painted the room. 
A beautiful gray color from Glidden called Pebble Gray.
I am in love with it! Not too blue, not too dark, just fresh and bright!

Next, I removed the cabinet door fronts from the window seat and taped off all the walls and inside of the seat.

 After I had done all the prep work {cleaning the cabinets, taping off the walls, and removing all hardware} I got out all the paint and started.


Gripper is my new favorite thing. I didn't have to sand the cabinets at all. It dries supper fast and adheres easily without scraping.


After two coats of Gripper and 2-3 coats of Satin white paint,  I was ready to drill some holes for hardware.

Have you seen this product from the Home Depot? 
It makes adding hardware easy and even. 

I love the way it turned out.


I used a flat sheet to cover the seat cushion. I had my mom sew me a giant pillow case to fit the bench seat cushion. That way I could easily remove it when it needed washed.


Ahhhhh.....so much better!


This room has a whole new look!

Loves,
Bon

Tuesday, September 10, 2013

Ali see....ALI CREATE!

 Ok, so I was wandering around Big Lots and saw THIS GOODIE! 
 I almost bought it, because really $12 buck is an AWESOME price, but the wheels started turning in my head.  I have been wanting to add a couple different blues to the color scheme in my family room to knock out the barnyard feel I have going on in there. It has felt  a little DRAB  in my depressed state!
  So I decided to create my own.
AND I really wanted 8 birds since that is how many is in our family!

Here is what I decided to paint! 
Brian and I are the LOVELY Lovey BIRDS and all our 6 kids are a different color.
 It's not perfect but I LOVE IT!!!!
 
What do you think?


Monday, September 24, 2012

Corner Hutch Gone Fabulous

My husband and I have four kids, four rabbits, twenty-five chickens, and two cats.

We also own a 2-bedroom house that is 1400 square feet and was built in 1915.

You can go ahead and feel sorry for me . . . I don't.

Our oldest son makes his bedroom in the short-ceilinged basement with the food storage and seasonal items.  Our other three share the "big" bedroom (about 28 feet by 12 feet) and my husband and I take the small bedroom (10 feet by 12 feet).  We love love LOVE our small house.  It's cute and cozy, and, best of all, there is a finite amount of space--we can only own so much stuff and we consider this a huge blessing.  (Plus, not to brag, we have a big ol' honkin' yard).

However, because there is limited space . . . if I ever get something for my house, it has to be one of two things: beautiful, or useful.  This corner hutch happens to be both.

I'll have to figure out what to put on the bottom two
shelves that my 13-month-old won't scatter everywhere
My totally awesome friend Meg GAVE this hutch to me . . . because generous is her middle name.  She refurbishes and sells furniture, and she could give my sisters a run for their money with her interior designer skills.  Check out Meg Torman Designing.  She's beyond compare.  She had used this hutch for her boys' room, then painted it turquoise to go with a bedroom set that she was gonna sell.  I happened to be over at her house during the height of her cleaning-out-the-garage pique . . . and she told me to take it.

Did. I. Ever.

I knew the perfect place for it, and I knew the perfect use for it: 1- dining room, 2- craft supplies. BOOM.

Before . . . 
My sweet safety-goggles-wearing husband went to town sanding
it for me (he wore the goggles using the belt sander)
Sanded and ready to paint!  I sprayed white spray-
paint in all the hard-to-get cracks before using a
paintbrush and an indoor satin white paint 
Coat number one . . . 
Three coats later . . . I can't decide whether or
not to put that little door back on the bottom shelf
I sprayed a coat of polyurethane on it before
bringing it inside, so it won't get tacky.  I also totally
anchored it to the wall, because that's how I roll.
Crayons in a wide-mouthed mixing bowl ($1.50 at the D.I.)
for Miss Mollie's easy access
Scissors and glue sticks in a cookie jar ($1)
Colored pencils in a retro quart pitcher (also $1)
Watercolor markers in a sweet triangular jar with
a cork lid ($2), baby colored pencils in a baby jam
jar (leftover from a yummy, homemade Christmas gift)
I love how it turned out: it takes up so little space, but still dresses up the dining room, adds a splash of color, and makes it so I never have to get craft supplies from the cupboard again.  In short, the perfect piece of furniture.


Now I can enjoy masterpieces like this on a daily basis.  (Notice the "M-O-M" just under Diego's backpack?  Yeah, this was multi-colored just for me).


Thursday, September 20, 2012

Patio Decor: Geography in Your Own Backyard

I have been waiting for this moment since I first gave birth eleven years ago . . . My son is in fifth grade.  And he is learning STATES AND CAPITALS!!!!!

Finally.  My area of expertise.

Of course I love maps (who doesn't?).  One of the first purchases I made for our first apartment was a laminated world map and United States map.  Later, I bought an actual roll-down map of North America off Ebay (I gave it to my sister Hanna when I had to build bookshelves in the only feasible place in my entire house that this map would fit . . . but that's a story for another time).  And my favorite way to wrap presents is with map-paper from old road atlases (check out the post I did here about it).  One of my favorite gifts my husband ever got for me (in 2005) was this geography coloring book, after he watched me print out maps from the Internet and spend hours coloring and labeling them.


But only having a fifth grader could prompt me to do what I have dreamed of doing since having my own home: painting a map of the United States on my very own concrete patio.  Oh yeah!  One week later, and I finally have the energy to blog about it.

I tried to "freehand" an outline of the US of A with chalk just by looking at the map in my atlas.  Um, yeah, Texas was even bigger and freakier-shaped than usual, and Maine and Florida belonged where Newfoundland and Cuba belong, respectively.

My "canvas"--the concrete patio on the back of our house.
Poor Calvin got to watch the entire two-hour process . . .
So I had to do it a real way.  I carefully drew a grid of chalk on my back patio.  It was thirteen, 1-foot spaces wide by six, 1-foot-4-inch spaces long.  And I even made the longitudinal lines get bigger as they went South . . . the better to represent the curvature of the earth, yo.

Totally set the timer and took this picture of myself . . . shameful
It took me about twenty minutes to lay out the grid.

That bowl has a wet rag in it so I could "erase" my mistakes
Then I began to work on the states with chalk.  The same way as reading: left to right, top to bottom (Only I actually went top to bottom, then left to right.  The West Coast must be chalked first).  That took an hour and a half.  Whew.  (The next day, I felt like I had done a thousand squats . . . as I very well may have done).

The West . . . like you've never seen it before 
All the easy, big states . . . 
I ended up using both atlases (one for kids and one for grownups)
because one had better longitude / latitude lines, and the
other had better outlines of the states themselves
When I finally had the whole thing done, I was so excited to start spray-painting.  "WAIT!"  You're thinking.  "Spraypaint?"  Unfortunately, my brain never told me that it might not be a good idea, because spraypaint is 1) fast, 2) cheap, and 3) lasts forever on concrete, as the many "project-spots" on my back patio can attest to.

Here goes.

I wanted to CRY after I sprayed the first couple states.  I worked so hard chalking the California coastline!  And now it just looked all  . . . spray-painty.  It was not as pretty and perfect as the chalk!

I stood for a while with the can in hand, like a vandal who can't decide which swear-word to graffito on the side of a box car in the dead of night when the only emotions she can conjure up are angst and rebellion . . . and I finally decided the same thing that said vandal would decide: go ahead and finish.


And I'm so glad I did!  It actually turned out to look pretty good.  Kind of stylized.  At the very last minute, I remembered Alaska and Hawaii, so I spent another twenty minutes chalking those two and then painting them (I actually left out the skinny strip of Alaska that butts up against British Columbia.  C'est la vie.)


Now, time to help Truman become around-the-world champion of his fifth grade class.  {If they still play around-the-world.  Did any of you play it?  My fifth grade teacher, Mr. Wood, gave king-size candy bars to anyone who made it all the way around the classroom . . . ah, those were my days of glory.}


Friday, February 3, 2012

All that Jazz

This is another simple painting project!

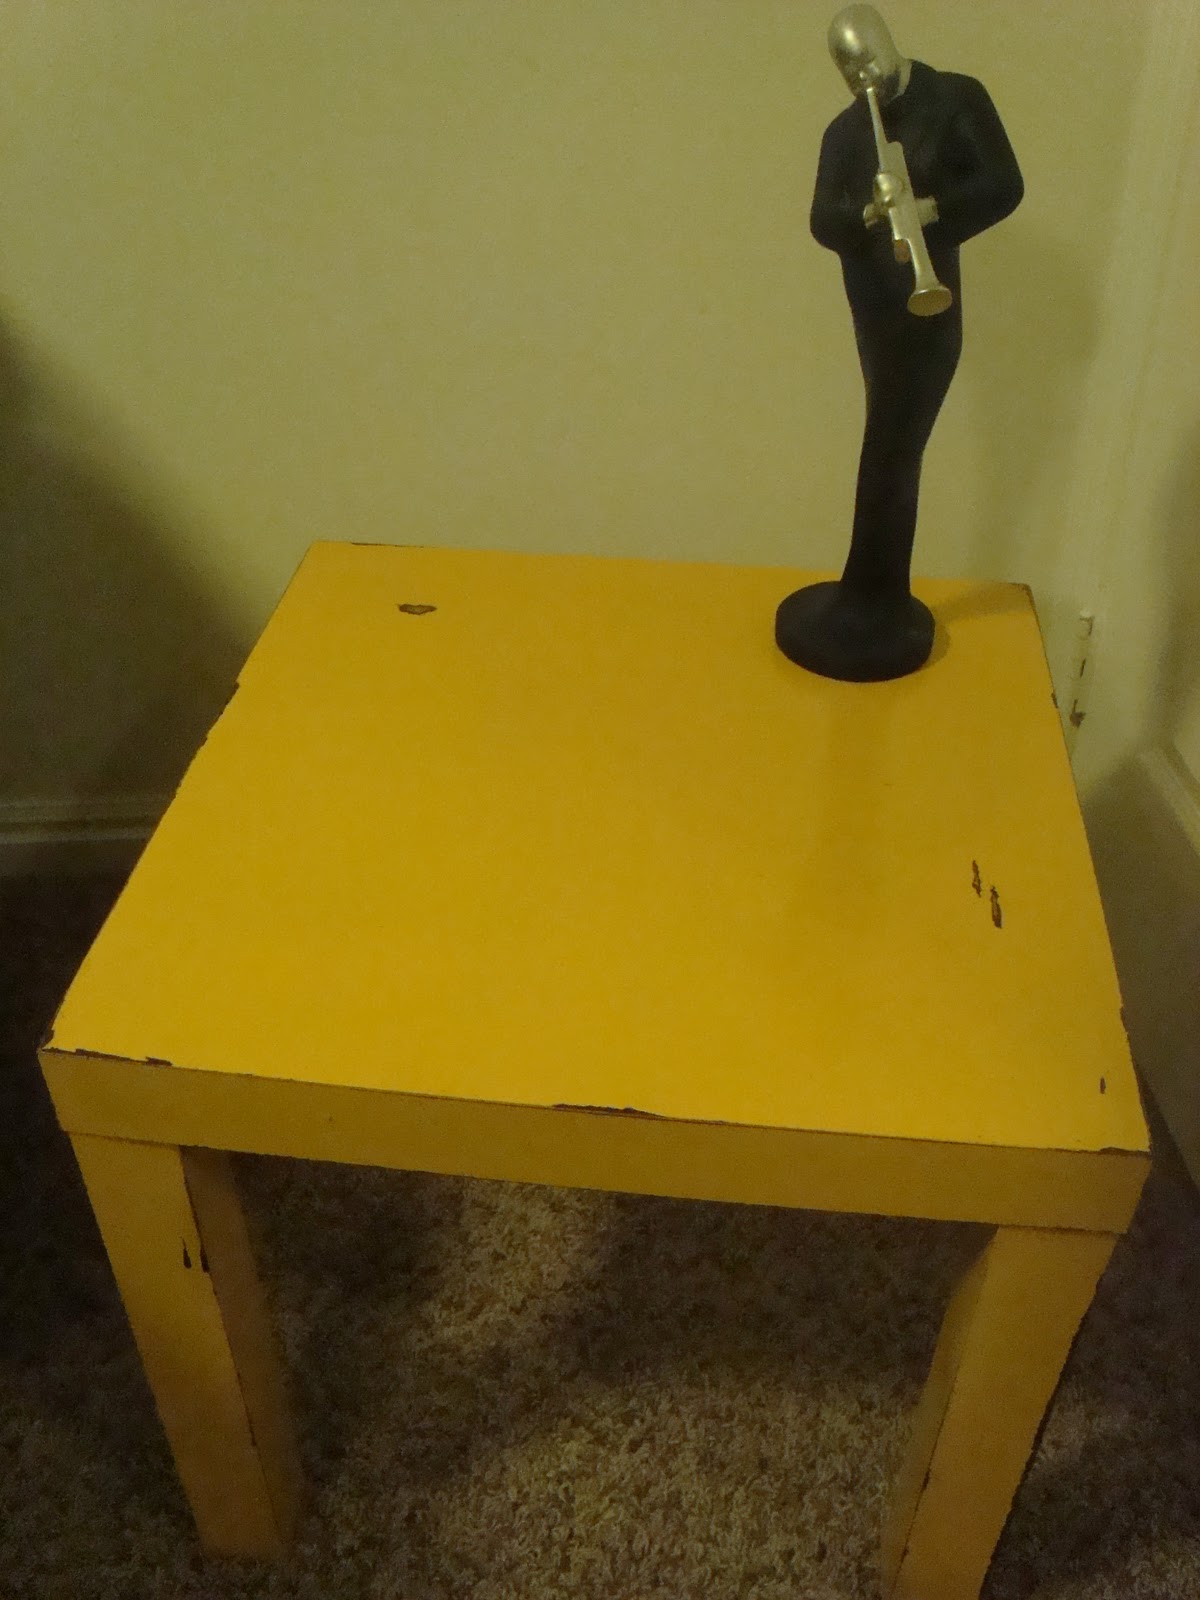
My husband HATES colored walls. He doesn't necessarily love white walls either.  if he has his way, every wall in our house would be tan... BORING!  So, I decided to compromise.  I told him I wouldn't paint our family room (Jazz music themed) a bright color, IF he let me paint the furniture whatever color I wanted.  He was hesitant but finally gave in! 
boring plain end tables


Paint them yellow (I didn't sand them down before I painted.  I SHOULD have, because it took me 4 coats to get this covered!)
scuff up the edges & add some scratches to the top with simple sandpaper!
Spray painted some end table decor/ room decor for my family room.
More spray painting - no more plain black candlesticks

add pieces to the end tables (the purple wicker basket underneath holds  my babies wipes/diapers/creams for when we are downstairs and I don't want to run upstairs for a diaper change.)

And the coffee table, i DID sand this one down (luckily)

I Painted it black first, and then lime green, so when you scuff it the black shows through!

Sprayed it with a gloss finish so it wouldn't be sticky and so the paint wouldn't get scratched off.  (Had to bring it inside to dry, outside is far too cold.)

Finished product.
 My Husband was actually pleasantly surprised at how much he liked the bright furniture!