Showing posts with label Fabulous Frames. Show all posts

Tuesday, March 31, 2015

Laundry Room Wall

I really love having a separate laundry room off the garage. It is nice to have the kids come home and be able to take their shoes, coats, and backpacks off without those items being strewn all over the house. However, I don't really love tripping over shoes, coats, and backpacks, which is usually the norm around here. I knew I needed a better organized system in the laundry room to make it a "trip free" zone. 

I wanted to use a wide bead board/paneling to be placed horizontally across the wall.
To give my laundry room wall a more welcoming feel and also for an easily wiped down surface.


A large white sheet can be purchased at home depot for around $20.00.
{This project took exactly one sheet}

I also purchased some 1x6 MDF to use as molding for the top of my bead board.


I like to use the baseboard MDF for several reasons. It is inexpensive, the outside is already white which cuts out priming, and it is easy to work with.

I also purchased robe hooks to use for their backpacks.


We measured the bead board to the wall and cut out the outlet holes. Then simply pin nailed it to the wall.
Next we placed the MDF 1x6 flush against the top of the bead board/paneling. 


Once the boards were all in place, my husband filled the holes with wood filler and lightly sanded it after it dried. Then I gave the whole thing a clean two coats of white paint!
Next we simply screwed in our 5 robe hooks.


I also wanted this small space to be cheery and inviting as the kids came home from school, so 
I dug out an assortment of frames (from my frame bin) and spray painted them all white.


I framed a few of my favorite printables and hung them on the wall! 


 It turned out perfectly!! 
And guess what? No more tripping over backpacks and coats!
Errrr....the shoes...well...that is another story.


Toodles,
Bon


Wednesday, March 25, 2015

Ledge Shelf

Have you seen the wonderful ledge shelves all over pinterest? I believe I saw a ledge shelf first on Shanty 2 Chic . I knew right away that I HAD TO HAVE ONE.
  I have this lovely wall that has given me so much heart ache and confusion. 


The angle has made me second guess everything I have considered putting there. 
But when I came across a few different styles of ledge shelves, I knew it would work perfectly. I could mount the shelf to the wall, centered, but use frames to stagger the heigth to work with the wall. 

My sister, Hanna, also recently added 4 gorgeous ledge shelves to her home. When I saw them in person I knew that I was on the right track and seeing her's only solidified my decision.

This is what I used.

{2} 8ft 1x4's
{1} 1x2 
Paint
Stain
Pin Nailer

YEP, that's it! Super easy!!
Of course I  opted to use my "man slave" --haha--that cute hubby of mine is pretty darn handy.


This is how you assemble it...

You could easily wood glue it too if you don't have a pin nailer.

Next mount it to your wall. We pin nailed it right into the studs.
{Sorry--this next pic is a "dumb phone" picture}


I have a frame bin. It is sad how obsessed I am with frames. I love oval frames, square frames, antique frames, pretty much any kind. So I buy lots at the thrift stores, because they always come in handy. I had everything already on hand that I used to decorate my shelf.
 I just simply spray painted a few items {ivy leaf is the green I used here} and framed some printables. 


 Doesn't it look perfect there? I am in love with it.

The best part is how narrow it sits to the wall.


 I love that you can see it from the front room too!
 {Yes, my daughter is feeding a baby sheep}

One more view...


See that banister? Well that is an upcoming post soon too! It is time for it to go bye bye.
Happy Crafting everyone.
Enjoy your week!
Bon


Tuesday, February 10, 2015

EAT Sign

Seriously my house is so empty. I have so much work to do to feel some of these voids. 
I was so excited about having kitchen cabinets I could decorate above. But I do admit, they are a bit overwhelming to me now.

I knew I wanted a large EAT sign, but couldn't find one simplistic enough for my taste. I found a perfect frame with great structure for $2.00. 


I made a simple 11x14 chalkboard EAT sign.
{Simply right click and "save image as" to use this free printable too. My gift to you!}


I then spray painted the gold frame with this spray paint.


I do love how it turned out. 
Perfect for the empty space above my microwave cabinet!


Happy Crafting,
Bon


Friday, December 5, 2014

A Tad Obsessed..

I am a tad  obsessed.
OKAY, maybe A LOT obsessed, with two things.
Picture frames and printables.
Can a girl really have too many? 
I can't pass up a picture frame with great structure to save my life. 

{I apologize about the before picture taken with my "dumb" phone. My camera has been on hiatus and I am starting to really want it back! Sigh.}
I scored this chunky beauty for $2.00

A little spray paint and some light sanding can turn any wretched old frame into a fun new piece.
I wish I could give credit to the maker of this printable. I found it on Pinterest but it isn't attached to a link. Isn't it the most adorable print ever?

Happy Crafting!

Toodles,
Bon

Wednesday, September 10, 2014

Quick and Easy Bathroom Accessories

Now that school is back in session I feel motivated to paint this white house of mine. I have picked out paint colors, purchased everything I need, and am about ready to finally start some projects.

Between the painting, I can't help but do little things here and there. I have a whole bin of projects I can't wait to get to.
We all know that I love spray paint.
 I have been getting so anxious to spray paint something. It has been far too long. 

Here is a quick, inexpensive, and easy way to accesorize any room.
Have you been saving all your old cans and glass bottles? You really should start. 
The possibilities are endless! I have been working on lots of little projects that involve tin cans and glass bottles. 

First up a worcestershire bottle.
I peeled off all the labels. And then soaked the bottle in dawn dish soap and water to help all the sticky parts come off easily. I simply spray painted the outside of the jar! And finished it up with some light sanding and a clear coat of spray too.

 Here is the finished bottle.

 Then, I just added a dollar store stem flower.
Easy, right?

My next project to help accessorize my bathroom was this frame.

Have you tried this gold metallic spray paint? It is AMAZING!
I can't get enough of gold right now!
The coverage is even and thick. So it only ever takes one coat. It covered up the words "25th anniversary" ,on the frame, with no problem.
After I spary painted the frame. I printed out this printable I designed.
{Simply click on the image, right click on "Save image as" and save to your computer}


It is a amazing how a couple small accesories can brighten up a little corner. 
Perfect for my girl's bathroom.
Don't ya think?


xoxo,
Bon

Wednesday, May 14, 2014

Awesome Art from Children's Books

I have always loved Arnold Lobel, but especially since I have had kids of my own and read them the Frog and Toad books.  It's a great first introduction to humor for your kindergarten-aged-kids.  Grasshopper on the Road never fails to make me laugh, as well.  When grasshopper meets a bunch of beetles who believe that morning is the best, and he dares to venture that he likes evenings, too, one beetle replies in a deadpan, "Stupid."  It cracks me up every time.

So, quite a while back, I found an Arnold Lobel book at the D.I. that I had never seen before, called Whiskers and Rhymes.  It was pretty beat up.
It's nursery rhymes populated entirely by cats, and many of the poems are quite funny.  I flipped through it, and found the coolest Arnold Lobel illustration ever: a cat with a beard reading a huge stack of books--so big that his house is coming apart.  And the rhyme that accompanied the illustration spoke to my SOUL:
          Books to the ceiling, books to the sky! 
          My piles of books are a mile high!
          How I love them!
          How I need them!
          I'll have a long beard by the time I read them!
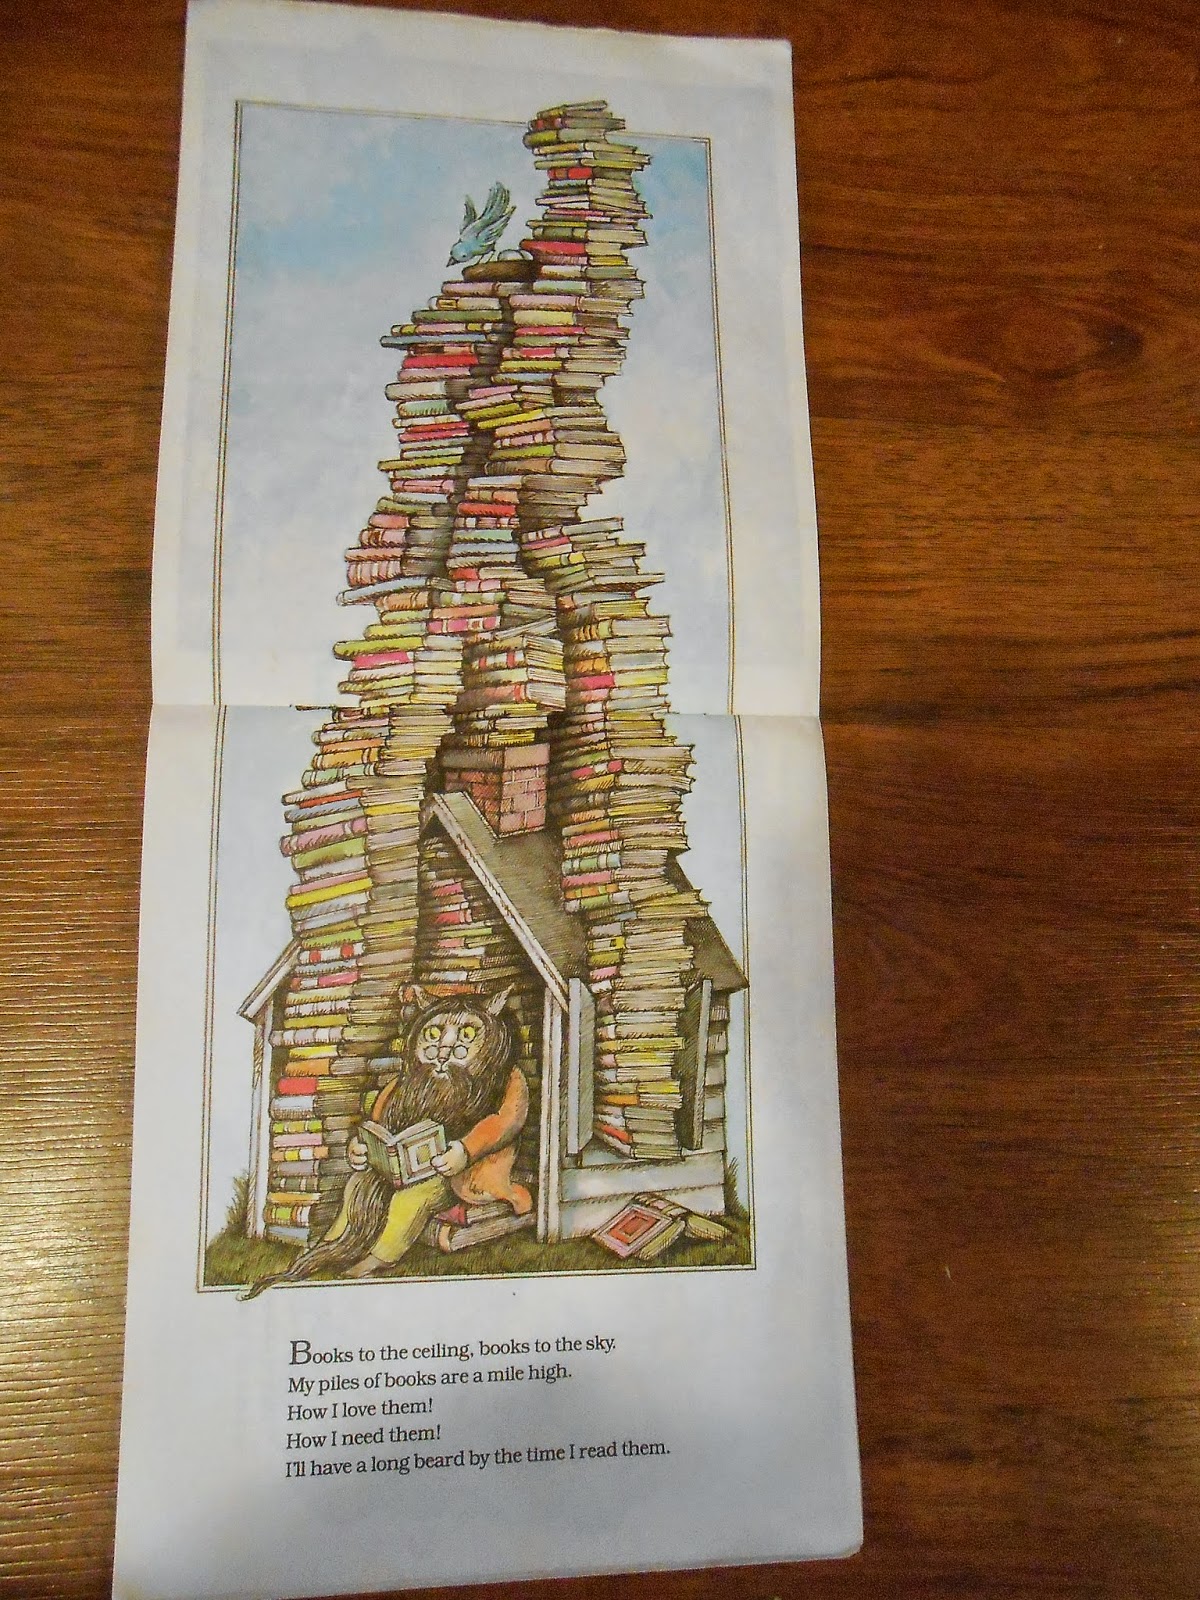

This is one of the only illustrations in the
book that takes up an entire layout.
I knew I must have this illustration and poem hanging in my "book nook"--a little landing at the top of the stairs in my 1915 house, where all the children's and young adult books are kept.  It's a little ironic, because I've been meaning to frame a few different pages from Lobel's Owl at Home, since my book nook is heavily populated with owls . . . but it took cat nursery rhymes to transform this idea in to reality.  It was just serendipity that they happened to be from the same author/illustrator.

Okay, first I had to find long, skinny frame for the illustration.  It actually took a few months of looking at the D.I. till I found the right one:
The art inside this frame had nowhere to go but up . . .
Next, I removed the staples from Whiskers and Rhymes and took out my picture.  It wasn't the middle page, so it was two separate pages that I had to carefully tape together (on the back, of course).

I cleaned up the frame, trimmed my picture a bit to make it centered, then covered the WRETCHED dishes picture with the delightful book picture.  The dishes picture wasn't matted--it had a faux-matte of navy blue around it.  I considered cutting out a matte, but didn't have the tools to make it perfect, so I just carefully glued my picture in the center.


 Now the best part!  Putting the picture inside the frame and hanging it up!


This entire project cost me $2.25: twenty-five cents for the book, and two bucks for the frame.  I didn't even have to paint the frame or change the color of the matte!

I love it so much that now I'm finally on the prowl for some cool, smaller frames to put some illustrations from Owl at Home into (I have long had two copies of Owl at Home--one to read and one for art).

I also love it so much that it inspired my choice of books for my May display--I love to change the children's books on display like a library does, and usually have a holiday or seasonal selection of books for each month.  In March I had all green books; in April I had chickens/ducks/geese books on display for Easter.  I was thinking of doing books with flowers for May, but discovered that I only have three books with large flowers on the cover.  But as I was going through all the children's books, I discovered that there are quite a lot which have a similar thing on the cover: CATS.

Tod likes to sleep right at the top of the stairs, so I moved
him over and created the perfect themed photo-op . . .
{Also, my kids are all obsessed with Cats, Cat Breeds, and Cat Care--who knew?}
My next post will be about my book displays--it is so cheap and easy to collect some great children's books, it's a fun and adorable way to decorate, and it's an awesome way to motivate your kids to READ.

Tuesday, September 25, 2012

Finished Gallery Wall

Should I be ashamed that it took me 9 months to finally finish my gallery wall? I mean all I had to do was fill in the frames with pictures. You would think because I am a photographer that the simple task of putting up a picture or two would have been easy, but no...I literally filled in the last picture frame this morning. And as sad as that is, I have new pictures of each child to put up again. SIGH....

If you missed how to make your own gallery wall for a small space you can check out the original post here.

So here is what it looked like when I first started.
And finally here is the AFTER now that it is all full.
Here is the top half.........


 .....and the bottom half........


 And finally the finished wall. 
It is nice to have a space for some of my obsessions- my kiddos, trees, and quotes.

It really makes such an impact in such a small and narrow hallway!
I love looking at it!!
XOXO,
Bon

Friday, January 13, 2012

Gallery Wall

I am absolutely in LOVE with all the beautiful gallery wall displays.
 But let's face it....
I have small hallways and limited wall space, so clustering frames together would make me claustrophobic.
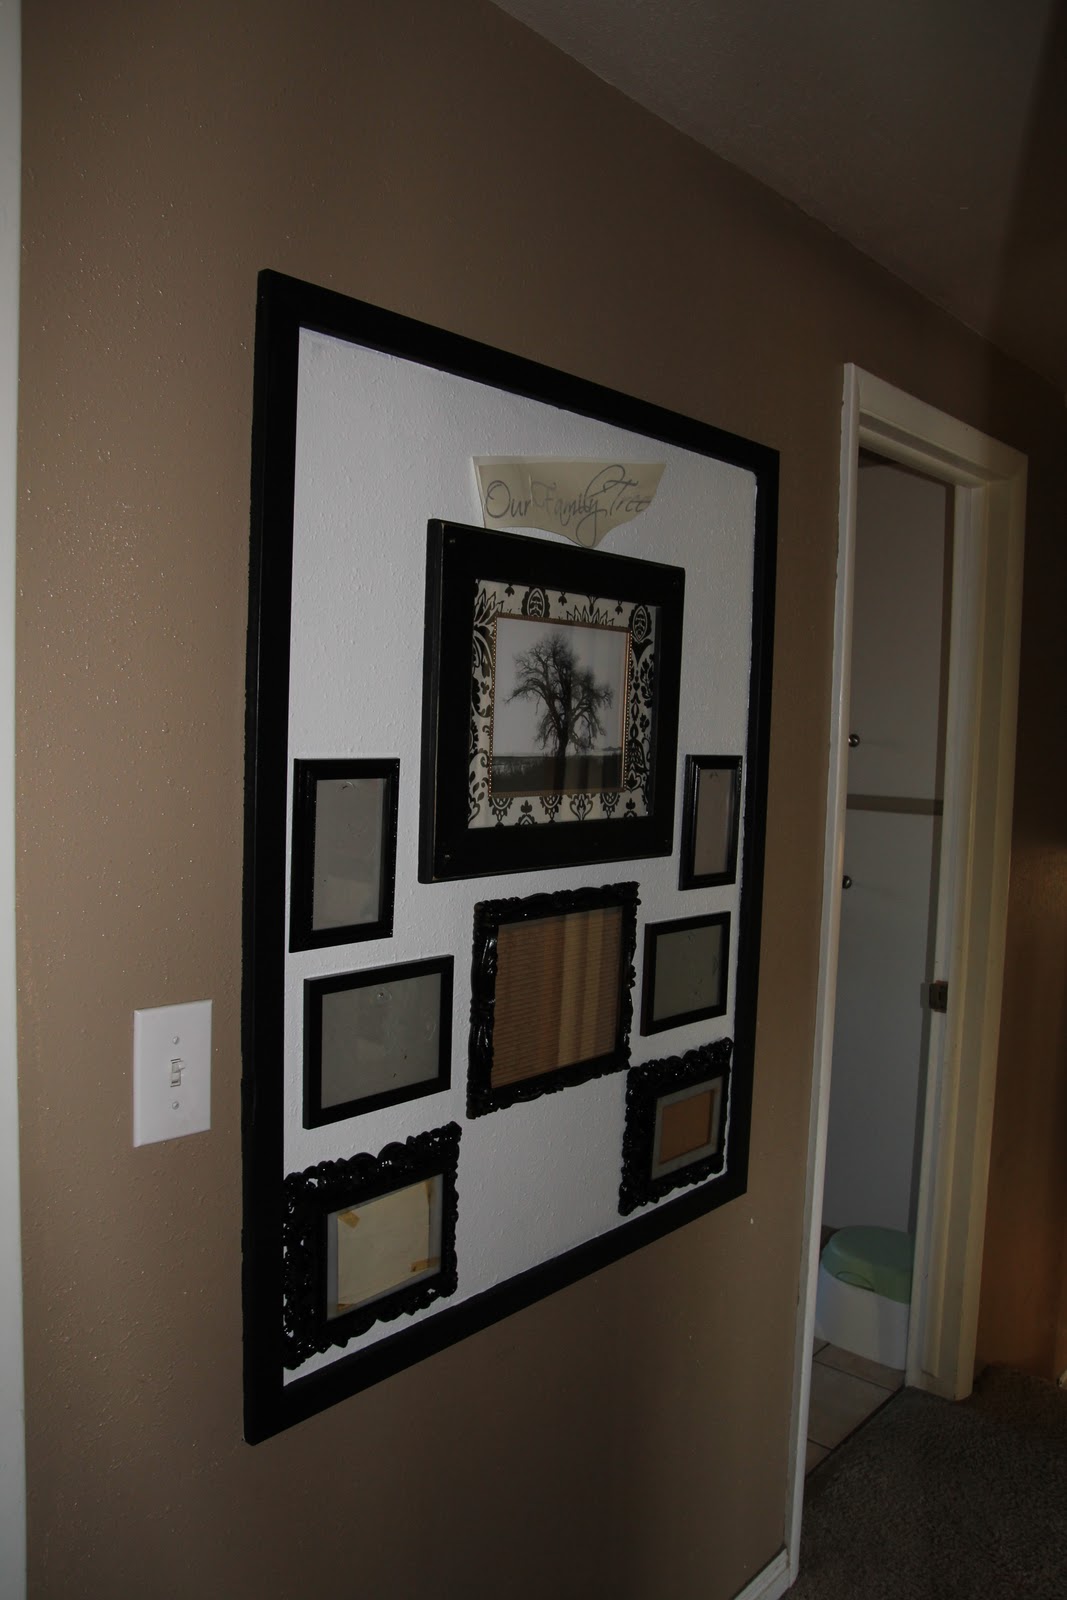
But I have had this idea for awhile to frame in, with molding, a piece of the wall and then collage picture frames.
Making it appear better balanced in my small space.

I first framed out my wall space. 

 I then painted the inside a stark white. I knew this would make everything pop. I started with stripes, but quickly decided that it was still too much for me. I needed to keep it clean and simple for this space.
So repainted the wall back to the stark white.


 Once I had it framed in and painted, I also painted the molding black.
(Note to self....make the molding frame first, paint it, and then pin nail it on....That would have saved me some taping and retouching. )
 Then I dug out my frame bin and started collecting all the frames I wanted to use for the wall! 
I took them outside to spray paint them black and then started to piece each frame  together on the wall. 
 More frames dug out and painted......

And VOILA!
Picture Perfect Family Tree Wall. 
 I love how slim to the wall it all is. My hallways are narrow and it doesn't make me feel confined!


 Now to collect which pictures I want up on the wall.
I am doing several with all kinds of trees, black n' white. 
And the rest with pictures of our family! 

Do you LOVE  it as much as I do??
I can't stop looking at it!
XOXO,
BON

Stop by soon for an updated wall with the pictures!