Tuesday, April 5, 2011

Tasty Tuesdays: Best Pizza Dough

I used to think that you couldn't make pizza at home as good as at a pizza joint, but am glad to admit that I was totally wrong.  I think the things that make all the difference are A) cooking on a stone at a very high temperature, B) homemade dough and sauce, C) quality mozzarella (the kind you have to tear into chunks yourself), and D), (if you really want to put it over the top) veggies and herbs from your own garden. . . in fact, if you always use the freshest ingredients possible, you'll be amazed at the taste of your own pizza.
The "deep dish" stone: before

Deep dish: after

This is the yummy "grownup" pizza I
made with tomato, Canadian bacon, and
oregano from our windowsill herbs.
If you want to have meat on your pizza,
Canadian bacon is the healthiest choice.

I love it that my husband doesn't like pineapple
on pizza . . . because that means MORE FOR ME.
I have pizza greed.

I've tried so many different recipes for pizza dough, but I always come back to this one from my friend Jessica: it's the easiest and the yummiest.  I make pizza at least twice a month, and this recipe can't be beat.  Use olive oil and as little flour as possible for a soft crust.  I usually make three thick crusts instead of four regular crusts.

Here are some step-by-step photos I took of the kids' cheese pizza.


Complement this recipe with Best Pizza Sauce (and topping) Ever.


Friday, April 1, 2011

Fabulous Frames

As I have stated in previous posts, I am slightly obsessed with frames.
My new frame obsession is ovals and circles!
LURVE!!

So you can imagine my elation when I stumbled across this wretchedly delightful oval wonder!
What a glorious beaut, don't ya think?

I grabbed my trusty black spray paint and gave it a once over.

My kind sis-in-law (aka-vinyl slave-tehe) cut me a new favorite quote and I rubbed it directly onto the glass.

Then I traced some paper to fit the frame and put it all together!

The only thing I payed for was the frame @ a bargain price of .50 cents! 
Stickety Steal!


I am sure I will  be moving it around the house until I find the perfect spot!

Tuesday, March 29, 2011

Tasty Tuesdays: Super Soft Sugar Cookies

I think the photos speak for themselves.  If you follow this recipe exactly, you can't go wrong.  (Get more of my cookie recipes at Bex Recipe Box).  This is my go-to recipe when I need to take cookies to one of my kids' classes at school . . . or on holidays . . . or when I am craving something delectably sweet . . .


Tuesday, March 22, 2011

Tasty Tuesdays: Belgian Waffles

Becca here.  I'm going to take over Tuesdays at D2F with recipes from my other blog, Bex Recipe Box.  Because while you're revamping furniture and faux-painting walls and making your house welcoming and unique . . . you may as well be eating yummy food, too.

When I went to my first year of college, my grandma bought a Belgian waffler for me to take along.  Not only was I grateful . . . I'm sure my roommates were as well, because Belgian waffles and apple pie were the only two things that I learned to make from scratch that year (just the essentials, peeps--I'm ashamed to admit how many Totino's pizzas I consumed freshman year).  Whenever we had boys over to our apartment for date night, Belgian waffles were invariably on the menu.

The recipe I used back in (gasp!) 1997 was not this recipe.  It was good, and it did use yeast (an essential ingredient for authentic Belgian waffles) . . . but it wasn't as totally fail-proof and delicious as this recipe.  These waffles are crispy on the outside and fluffy on the inside.  Crispaliscious.


My kids only want syrup on their waffles, which to me is a waste of a good Belgian.  You can't go wrong with fresh strawberries and whipped cream (peaches are equally delicious).  This time, I made a fruit compote with frozen raspberries, blackberries, and strawberries.  I sprinkled a tiny teaspoon of sugar on about two cups of frozen fruit and heated it in a saucepan on low while the waffles were proofing.  It tasted heavenly.

Wednesday, March 16, 2011

About Kailey

Finally, welcome our newest sister to Drab to Fab.
She married into our family recently and we couldn't have asked for a better SISTER!! 
We LURVE her!


Hi my name is Kailey.
I am the new sister to these crazy girls.
I married their brother in February and am LOVING married life.
I am excited to turn this house into our home!
I am a licensed cosmetologist and I love it.
I also enjoy  being with my family.

Tuesday, March 8, 2011

Seeing Red

When I found out I was pregnant with Baby #1, I had his room painted RED within 3 days (way before I knew it was a HIM), If you do decide to go with such a bold & dark color, remember that it takes a LOT of coats - I did FIVE coats, and it probably still could have used one more!

BEFORE- with red paint finished


I wanted to have stripes on one wall that POPPED, and a trim up top. So I put the hubby to work cuttin some boards for me!!!
AFTER

The boards are 2 inch wide by 1/4 inch thick. Paint em the color of your choice, and nail em to the wall!!! (we used a nail gun & penny-inch nails)


It was easiest to put up the border around the entire top of the room, then put the stripes on the wall.


Cut the bottom of your board-stripes at a 35 (or sharper) degree angle, to avoid painful encounters with your wall.

Add decor/furniture/accents!!! Simple letter cut outs accented with Scrap paper/hinges/buttons/ and Ribbon
I found these stars for 10 cents each at D.I. Simply put a nail through them, and hung them above the light switch!!!

Now go ROCK your ROOM!

Thursday, March 3, 2011

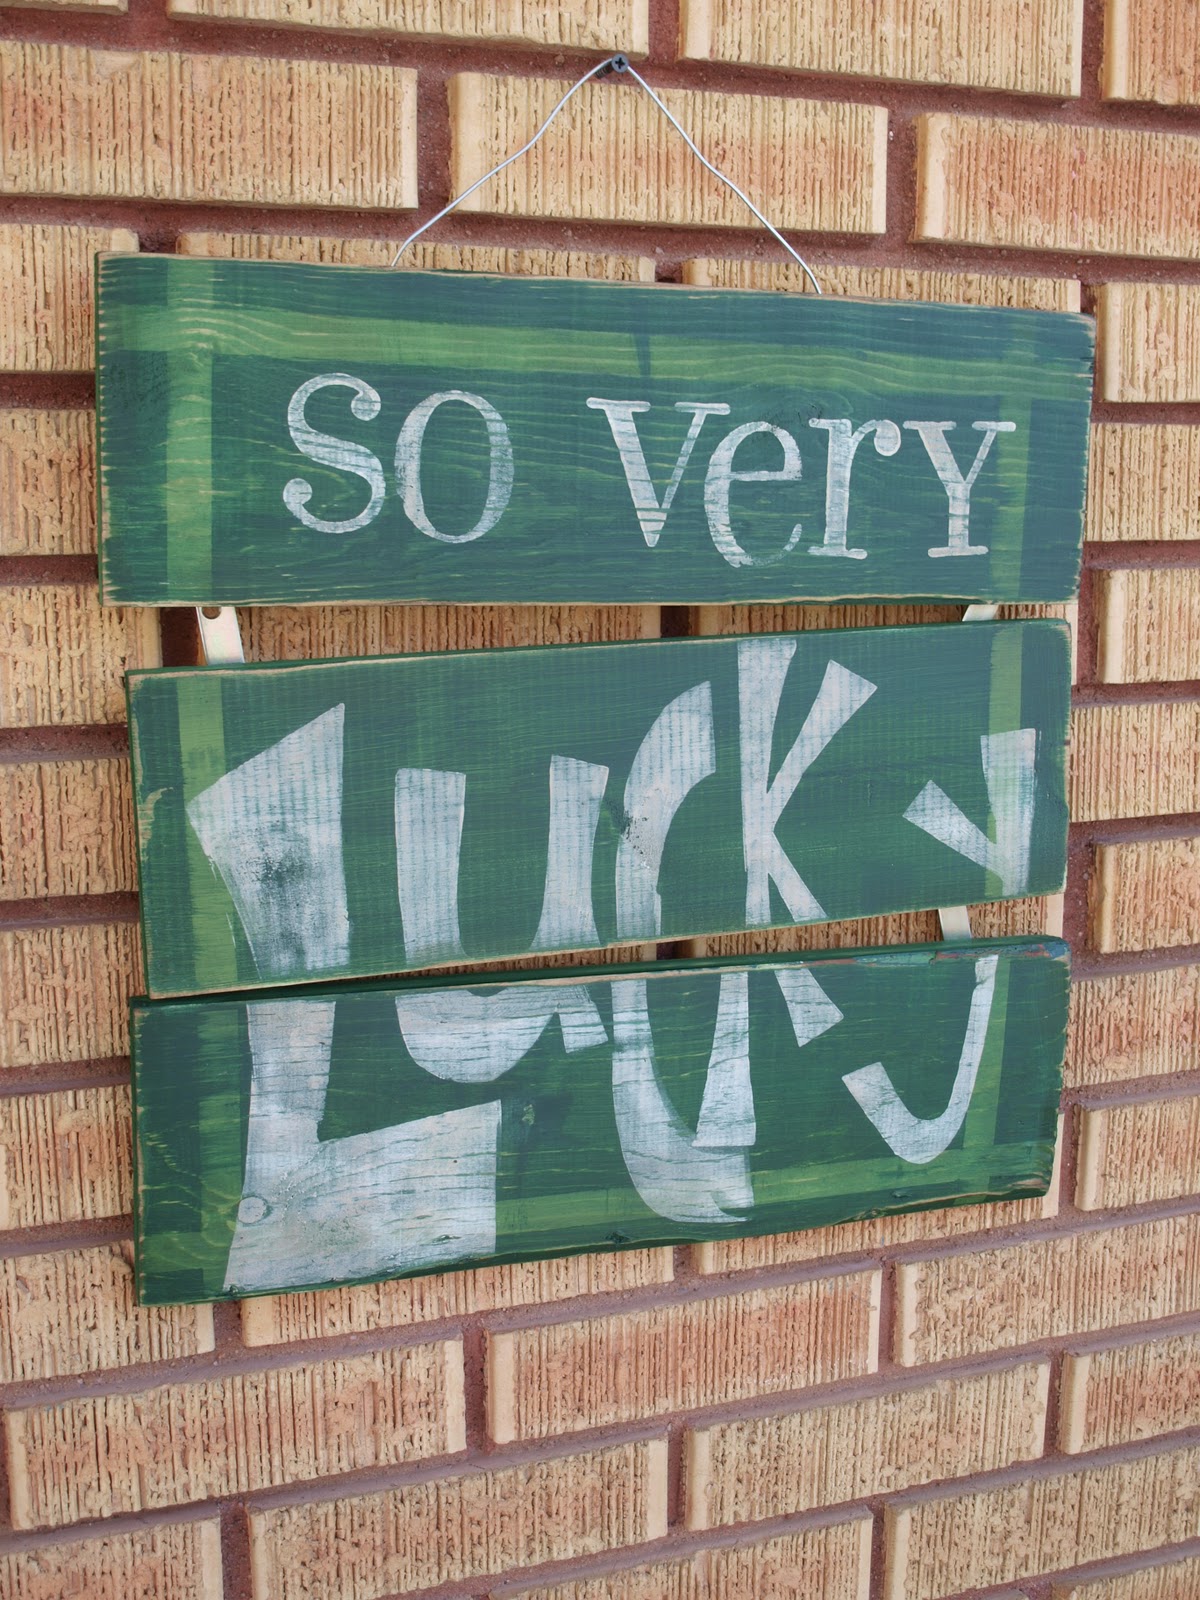
sO VErY....LucKY!

I better get a SHOUT OUT from each of my sister...I actually tok STEP-BY-STEP pictures, and forthose of you who have follwed me, know I DON'T DO THAT!  I am in too much of a hurry to remember! :O)
#1 Find 3 random boards in your scrap wood
(or cut 1X6 into 12 and 11inch peices)
#2 Paint the first layer Hunter Green (Walmart) Let Dry

#3 Paint the 2nd layer Leaf Green...let dry

#4 Push boards tgether and tape off edges

#5 Paint thick layer or Hunter Green over the top and edges (same paint as #2)

#6 Find stamps you want, and cut out your own with (Adhesive FOAM, Walmart Craft Isle) if you don't have what you want (Remember to cut it from the adhesiv side so it will not be backwards, and I found more scraps of wood to stick my stamp to, and then throw them in my rAnDoM Stamp box)

#7 Peel off tape :O)

#8 STAMPITTY-Stamp-Stamp-Stamp...let dry, and sand to your liking!

I found random connector things in my tool area and just screwed the back all ska-womped

What do you think? My very own-unique-handcrafted-limited edition-LuCKy SigN! Made in less than an hour!!!! YIPPEE! Up on March 1st ready to ADD luck to my month!
I was featured on.

MWMBH_Main