Thursday, February 25, 2010

Are you sick of Chairs yet?

So....First I'd like you all to compliment me on my skills of putting the chair in almost the exact spot and taking the second picture without looking at my camera...I just have an eye for these things...not to Brag! :O)


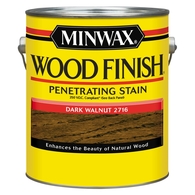
I have taken it upon myself to assume we've done enough tutorials on these chair for you to get how we do them....maybe I'm wrong if so....sorry it's the "80%er" in me. I just took pictures of before and after. So I used the SATIN Krylon Spray Paint I do not sand the chair down...I just spray paint it and then stain it with  Minwaxs Dark Walnut

I am looking for 5 more chairs like this...random and different, but all tall backs and old school...I am going to paint them all the same but recover them a little different. And then redoing my Kitchen table the same....  I think it will be SUPER FAB when it's all done. 

I'll Post the Finished FULL product when I find 5 more chairs. :O) The thing that stinks is I found 4 the day I bought this one for $4 dollars but I decided to wait...GRRRR!

Not so Super Fab...but at least it's not too Drab anymore....

SO I KNOW you have all learned...I am pretty much a slacker .Bon and   Han are on top of things...so it's not going to be a surprise when I say that I forgot to take a picture of these jars at first...and didn't remembered till after I was spray painting....???  
I can sense your judging eyes...DON'T JUDGE ME!

I found these Drab bins at the DI.
So 1st you are suppose to take a picture...and THEN spray paint.

Step 2- Sand to your liking....and check out what you've done....

Step 3 Add whatever you want...(for me hair bows, ribbons, elastics, and head bands....)

Step 4...(If you are me) wait till you move in a month to ACTUALLY have counter space so you can display the GOODS!
And not have a drawer full of  a mess!!!!

Wednesday, February 24, 2010

Boys Bed Part 1


Have you checked out the Knock Off Wood site?
This lady, Ana,  is amazing!
And totally gives us all the  sweet hook-up!


I have been thrifting high and low for sometime to find the type of bed I had envisioned for my boys room.
Tall back ,smaller front. 
But couldn't find one.
Finally after stalking (to put it lightly) the knock off wood site I found a bed so similar to what I had envisioned.

So after tweaking the plans slightly to adjust for a trundle bed. 
We are well on our way to having it done.
(we heightened  all the legs and also built the back board/foot board a little taller)

Here is my man slave  (tehe) hard at work cutting wood.


Lots of boards and cuts later we have a foot board...


Lots more cuts and measurements and now we have the head board...


Now on to the side rails...
(sorry I forgot to take pictures as we went along)


This is coming together rather nicely and quickly.


All thanks to this guy! 
When I say "  we"   worked on it together. 
We did, but mostly him. 
I really carried boards, helped measure, etc.

And as Mother Nature would have it, you can see in the pictures that it started to snow!
YES SNOW!!
ARGHHHHH!
So we got the bed sanded but the paint will have to wait until it warms up again!
So stay tuned!


Tuesday, February 23, 2010

Glass Goodie Jars....


I love displaying things in Glass jars around my house, and absolutely ♥ed how these ones turned out! 

First, purchase your jars. You can use all shapes and sizes. I found all of mine at the DI, (Local thrift store) from .50 to $1.00. 
I like to find uniquely shaped jars with chunky knobs.


Then you need small glass items to attach to the bottom of the jar. I found candlestick holders & small glass cups (also .50- $1.00 a piece).


Next, clean them up and purchase glass adhesive to attach the two together. I use this small window adhesive & primer found in the auto section at Walmart for Under $4.00 (they come together)! I have tried other adhesives, but I LURVE this one! First apply the primer all over the area you are going to glue,top and bottom. Then,  DIRECTLY after the primer, add the Glue and hold items together for 1 minute.( I usually hold it a little longer, just to be sure!)


Aren't they Lovely?
Can't you just imagine these at a childrens birthday party, filled with all sorts of yummy sweets? I can't wait to make more!


I filled them with Valentine Candy for February, and rewarded my kids with a little treat when they made a good choice. They loved it! This is such an easy project to add holiday decor into any home.


Now all I need to do is purchase some vinyl for my cricut and make cute little labels for each one! Aren't the Knobs divine?


I Hope that everyone had a beautiful Valentines day and that the rest of your month is filled with love!

Monday, February 22, 2010

Candlesticks

We are going to show you how to make some fabulous candlesticks on the cheap
And ALL BY YOURSELF!
Seriously people....that is the best part!

All you need is a 4x4....
and fence pieces back in the deck and fence dept. @ Home Depot.

To get started.....
Cut your 4x4 to whatever sizes you want your candlesticks to be! 
(I like mine tall and I always cut three in a pair and mix and match them around a room)


 Take your fence piece and pin nail it to the bottom. If you don't have a pin nailer, you could screw it together or wood glue it! I have done all three and all three work fabulously.


Now do the same thing and pin nail it to the top.

 It should look like this above picture.
Next sand these puppies down and paint your color or colors of choice.

And you now have these. 
(You can add hooks, frames, whatever accessories and flare you like. Just make them your own and express who you are!)
These are the ones I have displayed in my bedroom.
And here are some my sisters  made.
Instead of the fence ends they just used 1x4 as the base and topper. 

Hanna's Candlesticks...


Alison's Candlesticks....


Happy Crafting everyone!

Go make yourself some candlesticks! 
LInking up to-


Saturday, February 20, 2010

This "Lady" has Curves

So I have had this beauty for over a month now.
I payed $8.00.
Which, for me, is high.
( I know total tight wad right?)
But I loved the high back and fell in love instantly.


She has great lines and curves.
(I kept having the "sheer energy legs" song going through my mind)
 Double bonus... the seat is in perfect condition so I am keeping it the same.

So first I disassembled the seat.
Then I got this spray paint...

 
(oh I heart this color)
And gave her two coats.
I used one and a half cans.

Next, I sanded the edges. 
I wanted a antiqued feel to this chair!
 Then I applied some ebony stain over top.
I let it set for only a minute and then wiped it down!

 (Loving it)

Then applied a clear coat for protection over top of my painted beauty!


Next, I had to cut out this piece of wood and paint it.....


Cause the back of my chair was coming out, right here....

I debated whether or not to just tear out this backing. But I love it so I thought of another easy fix.

I pin nailed the board behind, like so...

Then I bought this piece....

 Painted it black and pin nailed that in.

 It really makes that back bone pop!
And now she is ready for her debut....
Work it girl....


And I already got to try it out on my last session!

Two chairs down...only like ten more to go.
But for now I think I will start on  some chest-of-drawers that have been calling my name!
Hope this weather holds out!

Have a fabulous day you crafty ladies!
I am linking up to
Poppies at Play
Finding Fabulous