Tuesday, August 28, 2012

Chest Of Drawers Armoire Redo

Seriously I am having thrift store anxiety. 
I haven't been for awhile now and I am itching to get my hands on a killer find like this one.
I found this one over a month ago. 
It was LOVE at first sight.
{sorry I forgot to take pictures as I went along...so what I have will have to do!}
Isn't it fabulous?
My husband was mortified. 
HE definitely could NOT see the potential of this piece. 

We unscrewed all of the hinges, handles, and knobs and gave them a nice new personality with my favorite stuff.

It totally brought them to life too!

We then painted this piece with black paint. 
And finished it off with clear coat spray.


Finally, now to enjoy.....
 

Well, someone else gets to enjoy it! I resold it within 2 days!
XOXO,
Bon


Sunday, August 5, 2012

DIY Pillows


I got this great find at the DI for $4.
I knew it needed something though...


So while I was visiting my sis, we decided to make some super cute and unique pillows!
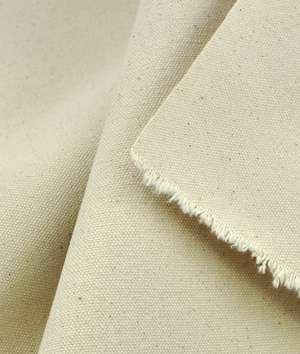
We grabbed some canvas that she already had at her house and we cut out our pillows.

To give our pillows some PizZaZz we used fabric pens and stencils from Wally World.


On one of my pillows I decided not to stencil on it but to add a fabric flower.


On the next two pillows I used the stencils and marker to give them a cute design and saying.

Put them all together and I would say that the basket looks much better and not so plain.
Now on to painting the basket....


Love, Sav

Friday, July 13, 2012

T-shirt Throw Pillow

I made this pillow for my son Truman for 2 reasons: 1) to preserve his two favorite shirts in a way he would like, and 2) because I was sick of him wearing only these two shirts.  You decide which reason influenced me more to break out the sewing machine.


Truman is almost 11, and this pillow is going to be one of his birthday presents.  The thing is, I know the main reason he wore these two shirts all the time was more because they were always in the top of his shirt drawer than anything else.  I don't think he has even noticed that the shirts are gone, because now he is wearing whatever 2-3 shirts are currently in the top of his drawer.  I need to go in his room and rotate his clothes if I want to see him dress with any variety.  But I digress . . .

Start with two shirts (clean & pre-shrunk)

Use a template to cut out equal-sized squares
(I used a 12-inch square of corkboard I had lying around)

Cut four rectangles the same length as the side of your squares,
you determine the width
{PS- the fabric I used came from a $2 red tablecloth
I bought at the D.I. specifically for this project---sweet.}

Sew right sides together on the tops and bottoms of your t-shirts

Cut four new lengths to match the long side of your sewn shirts

Sew right sides together along both sides of each piece, then sew
right sides together of both finished squares, leaving a hole for stuffing.

Stuff that pillow like a Thanksgiving turkey!
{I used stuffing from an old body pillow,
fluffing each piece before adding it to my new pillow}

Sew up the hole and present it to your intended recipient with love.

I like this project because it is super simple--much easier than making a t-shirt quilt, but still meaningful to your little basketball camper :).  Right now, Truman is sporting his 2012 basketball camp shirt about 50% of the time, so maybe in 2013 he'll get another pillow after attending Cardinal b-ball camp again.


Thursday, June 28, 2012

Armoire Redo

O.K. So do you remember this  piece I showed you awhile back?
A SCORE at the D.I. (local thrift store) for only 35 buckaroos.
Although it was love at first sight, this thing needed some work.
 It was missing a total of 5 drawers.
 Four on the inside and one that you can see at the bottom.
 So we started tearing out the old drawer holders....
Next up paint.
We ended up having to paint it 2 times.
The first time the white took on a cream look, so we had to start all over again to get it brilliant white.
We also  took off all the hardware and gave them new life with...

Then I found a tension rod to go on the inside to hang clothing.
Next I added some fabric behind the grate of the door.
I love that you can see the grate now too!
I filled the armoire to the brim with all of my baby things...(she is already so spoiled)
Now it is ready to display and use.

Now to fill that frame on the wall with a new picture of my girls
 and find an old chandelier to hang for lighting.
I am sooo in LOVE!
Do you love it too?
xoxo,
BON

Wednesday, June 20, 2012

DIY pergo floor cleaner

 I have blonde pergo floor all acrossed my front living space, front room, kitchen, and dining room.
It opens everything up and makes it nice and spacey looking, BUT it shows dirt like no ones business.
Anyone who knows me personally, knows that I have some major OCD when it comes to my floors.
I mop almost every single day....eeeekkkk...I know....it is a pain. But I HATE to see footprints, etc on my floor.

I am spending close to $40.00 a month on swiffer disposable wet mops. Don't get me wrong, I LOVE them. But let's face it there has to be a more thrifty way. So I scoured Pinterest, sure I would find something, and  didn't. So then I Googled floor cleaner and found a recipe I decided to give it a try!

DYI Pergo laminate floor cleaner
to a measuring cup or jar, add the following:
  • 1 part Water
  • 1 part White Vinegar
  • 1 part 2% Isopropyl Alcohol
  • Few drops of liquid dish detergent
  • opt. 5 drops essential oil for smell
Mix all ingredients together and pour into a fine mist spray bottle.
Like so.....

How to Use Homemade (DIY) ‘Pergo' Laminate Flooring Cleaner

  1. Sweep or vacuum your floors first
  2. Spray the cleaner in a fine mist, low over the surface area to be cleaned
  3. Allow to set for a few minutes, then use a microfiber mop or towel to wipe it up. 
Since I had the swiffer wet mop I decided that I would still use it with a towel. But then I got to thinking that a regular wash cloth isn't as absorbent as some of the towels out there. I remembered seeing some knock off Sham-Wows @ the dollar store.  So I ran to pick up a few. You get 2 per pack @ $1.00 (they are called Shammie Whammies) The best part is they are reusable, so no more wasting!
I just attatched them like so....

I simply spritz the DYI cleaner across the floor and mopped....
One Shammie Whammie does the whole floor. I was using 3 wet mops per day before.
You'll notice right away that this mixture cleans effectively and with ease, dries quickly, and it is so simple to use. The best part is there is NO BUCKET REQUIRED and it is SO INEXPENSIVE!

(* side note, if you by the $ store Shammie Whammies....wash them and hang them to dry. Don't dry int he dryer or use fabric softner.)

Look at how well this cleans!!
Ewwwwww.......I KNOW!

Tuesday, June 19, 2012

Light Fixtures

So I have had this chintzy gold light fixtures FOREVER now. I have had every intention of taking them down and spraying them, but let's face it, I forget half of the time. 
Finally my husband took them down for me.
Here are the befores....
 The shade of gold is not my fav unless it is real gold worth some $$.
I don't hate the white ceiling fan, but it shows dust all the time.
And this one needs to go too!

So I got out my favorite spray for metal.....
Hammered Brown by Rust-oleum
....and sprayed away!
Now I am asking myself WHY on earth it took me so long. It looks SO SO much better!

Here are the afters....

 I can't wait to do my white ceiling fans downstairs now.
Check out my sister Ali's before and afters as well....HERE

XOXO,
Bon